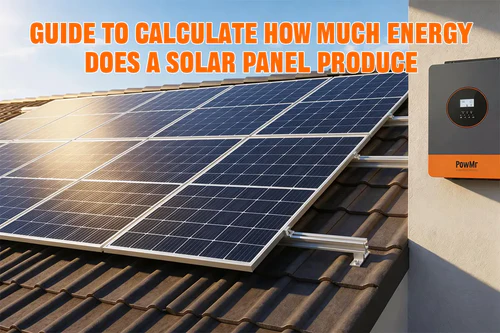
RV Solar Power System Guide: Batteries, Inverter, and Panels
If you’re living full-time in an RV or planning extended boondocking trips, building a reliable solar power system isn’t a luxury — it’s the backbone of your entire lifestyle on the road. The RV setup, whether you’re working with a Class A motorhome, a fifth wheel, or a converted van, introduces a unique set of power demands and roof real estate constraints that make solar planning both an art and a science.
This guide walks you through everything from sizing your battery bank to selecting the right inverter, written for people who want to actually understand their system rather than just copy someone else’s parts list.
Why Solar Makes Sense for RV Living
Living in an RV is ultimately about mobility and independence, and your power system plays a big role in how free you really are. Solar changes the way you think about energy on the road, removing many of the limits that come with traditional power sources.
Freedom Beyond the Grid
Solar lets you stay off-grid without relying on shore power or a noisy generator. Instead of fuel and engine noise, you get silent, steady energy that follows you anywhere the sun shines—giving you true flexibility in where you park and how long you stay.
Long-Term Financial Value
While upfront costs can be high, solar often pays for itself within a few years through savings on campsites and generator fuel. After that, energy is essentially free. With no moving parts and long lifespans (often 25+ years), solar is a durable, low-maintenance investment.
Quiet Comfort & Better Etiquette
Solar eliminates generator noise, creating a more peaceful experience for you and your neighbors. It also removes the need to manage fuel or run schedules, making daily life simpler and more relaxed.
Smarter Energy Use
Living on solar naturally makes you more aware of your power consumption. You start using energy more intentionally, improving overall efficiency without feeling restricted.
Environmental Fit
Solar reduces reliance on fossil fuels while camping in natural places. It won’t erase your footprint, but it does meaningfully lower the impact of extended stays in the outdoors.
Energy Audit
Before buying any solar panels or batteries, the most crucial step is conducting an energy audit. Many beginners skip straight to figuring out “how many panels to buy,” which often results in either an underpowered system that leaves you without power or an over-invested setup that wastes money. An energy audit is essentially creating a “power bill” for all the appliances inside your RV.
Step 1: List Your Electrical Devices
Categorize your appliances into two groups:
Direct Current (DC): e.g., lights, water pumps, ventilation fans, 12V refrigerators.
Alternating Current (AC): e.g., microwaves, coffee makers, laptop chargers, air conditioners.
Step 2: Find the Power Rating (Watts)
Check the label on the back of each appliance to find its power rating in Watts (W). If the label only shows current (Amps) and voltage (Volts), you can easily calculate the wattage:
Watts = Amps × Volts
Example: A 12V fan pulling 3A of current consumes 36W of power.
Step 3: Estimate Usage and Calculate Total Daily Consumption (Wh)
Honestly evaluate how many hours a day you will use each device, then multiply that time by the appliance’s wattage to find its daily energy consumption in Watt-hours (Wh).
Power (W) × Daily Use (h) = Daily Energy Consumption (Wh)
Here are a few usage estimate examples: LED lights typically run for about 5 hours, while a 12V compressor fridge, which automatically cycles on and off, generally has 8 to 10 hours of active running time per day. For laptop charging, an estimate is around 3 hours.
Once you calculate the Wh for each item, add them all together to get your accurate Total Daily Power Requirement. For example, if your grand total comes out to 1,500Wh, you will use this number as the baseline when calculating your solar panel and battery capacity in the next chapter.
Sizing Your Solar Array
Once you know your daily consumption, you can work backward to figure out how many watts of solar panels you need. The core calculation accounts for the number of effective peak sun hours at your typical location, which varies significantly between a desert in Arizona and a forest in the Pacific Northwest.
The general sizing formula is:
Required Solar Wattage = Daily Wh Consumption ÷ Peak Sun Hours × System Loss Factor
System losses from wiring resistance, charge controller inefficiency, battery inefficiency, and temperature derating of panels typically reduce your usable output by around 20 to 25 percent. A loss factor of 1.25 is a reasonable starting point for most builds.
To put this into concrete terms: suppose your audit reveals a daily consumption of 1,800 Wh, and you plan to travel primarily through the American Southwest where you can realistically count on 5 peak sun hours per day. Dividing 1,800 by 5 gives you 360 watts of ideal output. Multiplying by the 1.25 loss factor brings you to 450 watts of panel capacity. That’s a practical, real-world number, not the marketing figure printed on the box.
It’s worth noting that peak sun hours are not the same as daylight hours. A location might have 10 hours of daylight but only 5 hours where the sun is intense enough to drive panels at their rated output. Tools like the NREL PVWatts calculator or the Global Solar Atlas can give you accurate averages for specific regions.
Secondary factors that affect real-world solar output include panel tilt and orientation (flat-mounted RV panels lose some efficiency compared to south-facing ground mounts), shading from roof vents or air conditioning units, dust and debris accumulation, and the ambient temperature of the panels themselves. Solar panels actually produce less power on very hot days than on cool, sunny days, which often surprises first-time builders.
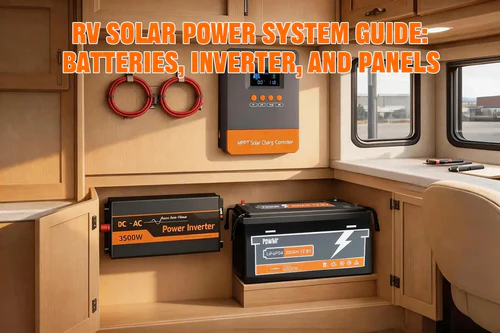
Building Your Battery Bank
Your battery storage system is where the energy produced during the day gets stored for use at night or during cloudy stretches. The most important decision here is chemistry: lead-acid (including AGM and gel variants) versus lithium iron phosphate (LiFePO4).
Lithium has become the dominant choice for serious RV solar builds, and for good reason. LiFePO4 batteries can be discharged to about 80 to 90 percent of their rated capacity without damage, while lead-acid batteries should only be drawn down to 50 percent to preserve their lifespan. That means a 200Ah lithium battery delivers roughly as much usable energy as a 400Ah AGM bank, at a similar or lower total cost when you factor in lifespan and weight savings.
The sizing formula for your battery bank is:
Required Battery Capacity (Ah) = (Daily Wh × Days of Autonomy) ÷ System Voltage ÷ Depth of Discharge
Using the same 1,800 Wh daily consumption, targeting 1.5 days of autonomy as a reasonable buffer for cloudy days, at 12V system voltage with a 0.85 usable depth for lithium: (1,800 × 1.5) ÷ 12 ÷ 0.85 = approximately 265Ah of lithium capacity. Most builds round up to a commercially standard size, and in this case a pair of 150Ah or 200Ah batteries would work well.
One thing that often surprises people is how quickly battery capacity fills up relative to solar input in good conditions. This is why both components need to be sized in relation to each other, not independently.
Choosing a Solar Charge Controller
Your charge controller acts as the brain between your solar panels and your battery bank, regulating the power to ensure your batteries charge safely and efficiently.
For modern RV builds, an MPPT (Maximum Power Point Tracking) charge controller is almost always the right choice. It actively optimizes the voltage coming from the solar panels to match exactly what the batteries need at any given moment. This intelligent tracking can yield 20 to 30 percent more energy compared to older, basic PWM (Pulse Width Modulation) controllers—a difference that becomes incredibly noticeable in partial shade, cloudy weather, or cold conditions.
To size your charge controller properly, use this simple formula:
Charge Controller Rating (Amps) = (Total Panel Wattage ÷ System Voltage) × 1.25
The 1.25 multiplier adds a necessary 25 percent safety margin to handle power spikes. For example, if you have a 450W solar array on a standard 12V battery system: 450 ÷ 12 = 37.5 amps. Adding the safety margin pushes this requirement up, making a 50A MPPT controller the safest and most appropriate selection for this setup.
Sizing a Solar Inverter
While your batteries store DC power, standard household appliances plug into AC power. Your inverter bridges this gap, converting stored energy into usable electricity. Selecting the right inverter isn’t just about picking a random wattage; it requires matching the unit strictly to your RV’s electrical architecture and your specific power habits.
Key considerations when selecting an inverter:
Voltage & Phase Matching: Ensure the DC input matches your battery bank and the AC output matches your region (e.g., 120V). Standard 30-amp RVs need a single-phase 120V inverter, while large 50-amp rigs running heavy 240V appliances require a split-phase model.
Rated vs. Surge Power: Size the continuous wattage to handle your largest simultaneous load (e.g., a 2,000W inverter comfortably runs a 1,200W cooktop and a laptop). Also check the surge wattage—appliances with motors like air conditioners or fridge compressors need 2 to 3 times their running wattage just to start up.
Pure Sine Wave: Always choose a pure sine wave inverter over a modified sine wave model. It perfectly mimics grid power, which is strictly required to keep sensitive electronics (like laptops and TVs) from buzzing or failing.
Physical Placement: Mount the inverter as close to the battery bank as safely possible. High-current DC cables are thick and expensive, and keeping the cable run short minimizes voltage drop and maximizes efficiency.